3D Halloween: Creating Depth Without the Design Headaches
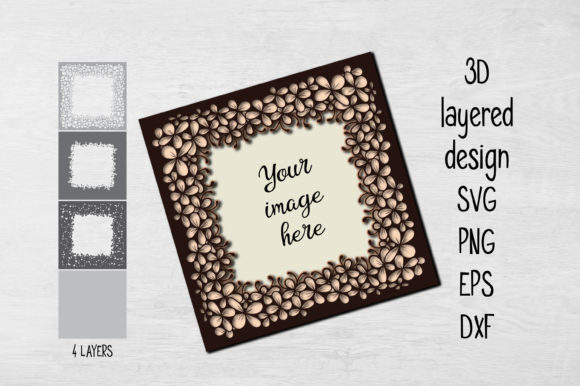
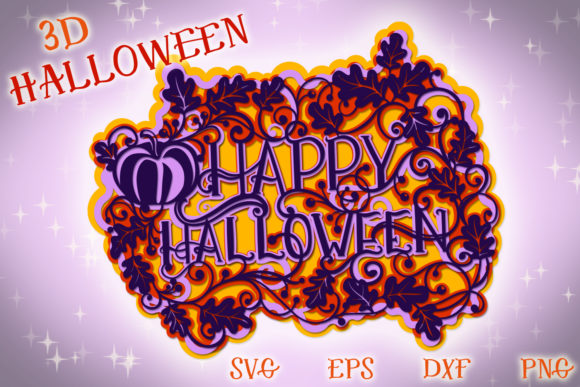
When you see a stunning 3D Halloween display, it is easy to assume that achieving that level of depth requires advanced graphic design skills or expensive software subscriptions. The reality is often quite different. The magic usually lies in smart file preparation and understanding how layers interact. This specific layered design transforms a flat concept into a dimensional masterpiece by utilizing pumpkin, fall leaves, and distinct typography across four separate layers. It is not just about having a cool image; it is about having a functional blueprint that works seamlessly with your cutting machines and printing workflows.
Many creators rush into projects without checking the technical specifications of their files, leading to wasted material and frustrated hours of troubleshooting. Before you commit to buying or downloading any asset, you need to understand what makes a 3D design truly effective versus one that looks good on screen but fails in production. The difference often comes down to the number of cut points and the clarity of the layer separation.
The Hidden Complexity of Layered Designs
A common misunderstanding among beginners is assuming that all vector files are created equal. You might download a "3D" design only to find that the layers are grouped together, making them impossible to separate for cutting. When you attempt to use such a file, you end up cutting through every single element as one solid piece, destroying the illusion of depth entirely. This mistake not only ruins the aesthetic but also wastes expensive materials like cardstock, vinyl, or foam board.
Another frequent oversight involves the complexity of the cut paths. If a design has thousands of unnecessary cut points, your machine will take forever to finish the job. This inefficiency can be a dealbreaker for small business owners trying to meet tight deadlines or hobbyists who want to spend more time decorating and less time waiting for their Cricut or Silhouette cutter. The frustration of a machine running for hours over a simple project can quickly dampen the excitement of the holiday season.
To avoid these pitfalls, always inspect the file structure before finalizing your purchase. A well-optimized design should have clean lines and minimal nodes. Look for assets where the cutting points have been reduced to a minimum. This optimization ensures that the cutting process is significantly faster, allowing you to produce high-quality decorations efficiently. It is a small detail that makes a massive difference in your workflow and the final quality of your output.
Selecting the Right Format for Your Project
Once you have secured a high-quality design, the next critical decision is choosing the right file format for your intended application. Not all formats serve the same purpose. For instance, if you plan to add this design to digital greeting cards or social media posts, a PNG is your best bet. However, if you intend to cut physical shapes for home decorations, paper crafts, or other materials, you need vector formats like EPS, SVG, or DXF.
Using the wrong format can lead to pixelation when you try to scale up a print or jagged edges when cutting. Many users make the mistake of trying to trace a raster image (like a JPEG) themselves, which results in a loss of precision and a much longer setup time. Instead, opt for a package that includes multiple formats. Having access to EPS, SVG, DXF, and PNG gives you the flexibility to adapt the design for various needs without losing quality.
- EPS: Ideal for professional printing and large-scale banners where vector scaling is essential.
- SVG: The standard for most modern cutting machines, offering excellent compatibility with design software.
- DXF: Crucial for industrial CNC routers and laser cutters used in commercial settings.
- PNG: Perfect for digital displays, website graphics, and printable templates that do not require cutting.
By ensuring you have the correct formats, you eliminate the guesswork and prevent the frustration of incompatible files. This preparation step is vital for anyone looking to create professional-grade Halloween decor.
Maximizing the Four-Layer Advantage
The specific design we are discussing features four distinct layers: the background typography, the pumpkin elements, the fall foliage, and the foreground accents. This multi-layer approach is what creates the true 3D effect. However, simply stacking these layers is not enough; you must assemble them correctly to maintain the visual hierarchy.
A common error occurs during assembly when users fail to account for the spacing between layers. If the elements are too close together, they may look muddy or flat. Conversely, if they are spaced too far apart, the connection between the pumpkin, leaves, and text can feel disjointed. To achieve a balanced look, consider using foam adhesive dots or double-sided tape to physically separate the layers. This technique lifts the top elements off the base, casting subtle shadows that enhance the depth perception.
Furthermore, think about the material you choose for each layer. Using different textures or colors for the four layers can elevate the design from a simple craft to a sophisticated centerpiece. For example, you might use a matte black cardstock for the background text, a vibrant orange for the pumpkins, and a textured kraft paper for the fall leaves. This variety adds richness and prevents the design from looking monochromatic or boring.
Practical Applications Beyond Home Decor
While home decorations are the most obvious use case, the versatility of a high-quality 3D Halloween design extends much further. Small business owners can leverage these assets for promotional materials, creating eye-catching window displays or custom packaging that stands out during the busy fall season. Marketers and bloggers can use the digital versions for engaging blog headers or email newsletters, driving traffic with visually appealing content.
Educators and freelancers can also find value in these resources. Teachers can use the cut-out elements for interactive classroom projects, helping students learn about geometry, layering, and seasonal themes. Freelance designers can incorporate these pre-made elements into larger client projects, saving time while delivering premium results. The key is recognizing that this is not just a template; it is a toolkit for creativity.
Remember to check the instructions provided with the design. In many cases, the third preview contains crucial guidance on how to arrange the layers and select the appropriate materials. Ignoring these instructions can lead to subpar results, whereas following them ensures a polished, professional finish. By paying attention to these details, you ensure that your 3D Halloween project is not only beautiful but also efficient to produce and durable enough to last throughout the holiday.
Ultimately, the goal is to create something that brings joy and atmosphere without unnecessary stress. By avoiding common mistakes regarding file formats, cut points, and assembly techniques, you can focus on what matters most: enjoying the creative process and showcasing your unique style. Whether you are a seasoned pro or just starting out, the right tools and knowledge will help you achieve a stunning result every time.